FLOWCHART - What does it mean in Fighting Games?
Brian_F · 13:40
Definition, predictable patterns and a fighting-game example.
Watch on YouTube ↗ COACH COSMIC
Start with one situation. Build the next decision.
Guest charts save in this browser. Sign in with your existing site account to keep private charts across devices.
Choose your weapon, select a box, then add what happens next.
Select a box to edit it. Add a next step to connect it automatically.
Drag boxes to arrange them. Tap a box to edit. On a phone, swipe empty canvas to scroll the page; turn on Pan mode to move the chart. Use two fingers to zoom in Pan mode. On desktop, Ctrl or Command + scroll zooms. Arrow keys move a selected box. Enter edits it. Escape leaves Connect or Pan mode.
A map of your decisions: the situation, a response, the next branch and the point where you reset. Build a plan you can adapt as the opponent responds.
Name the opening or situation.
Write the response you are covering.
Connect what changes your next action.
Show when the sequence ends.
Brian_F · 13:40
Definition, predictable patterns and a fighting-game example.
Watch on YouTube ↗More Brian_F · 3:51
A short introduction to why a flowchart matters.
Watch on YouTube ↗Pink Fresh · 13:05
A gameplan example focused on adapting to situations and opponent habits.
Watch on YouTube ↗Zenex asba · 8:02
Brawlhalla application. “What Is A Flow Chart?” starts at 1:35.
Watch on YouTube ↗perm · 25:58
Supporting lesson: improvement mindset and working on one weakness.
Watch on YouTube ↗Zen · 25:32
Supporting lesson: doubles decisions, adaptation and communication.
Watch on YouTube ↗Original creator videos. The last two support mindset and doubles learning; the first four explain flowcharts and gameplans directly.
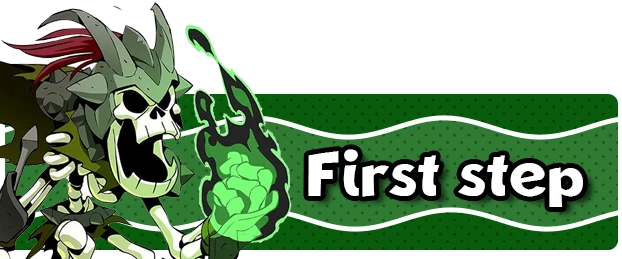
Build your decision map ↓A finished BrawlFlow chart makes your decisions visible: the opening, the condition for each branch, the response you cover and the point where you stop. These original charts show how I map those choices.
Start from safely placed neutral. Compare form, dodge response, height, and the route back to a stable position.
Study the Chakrams decisions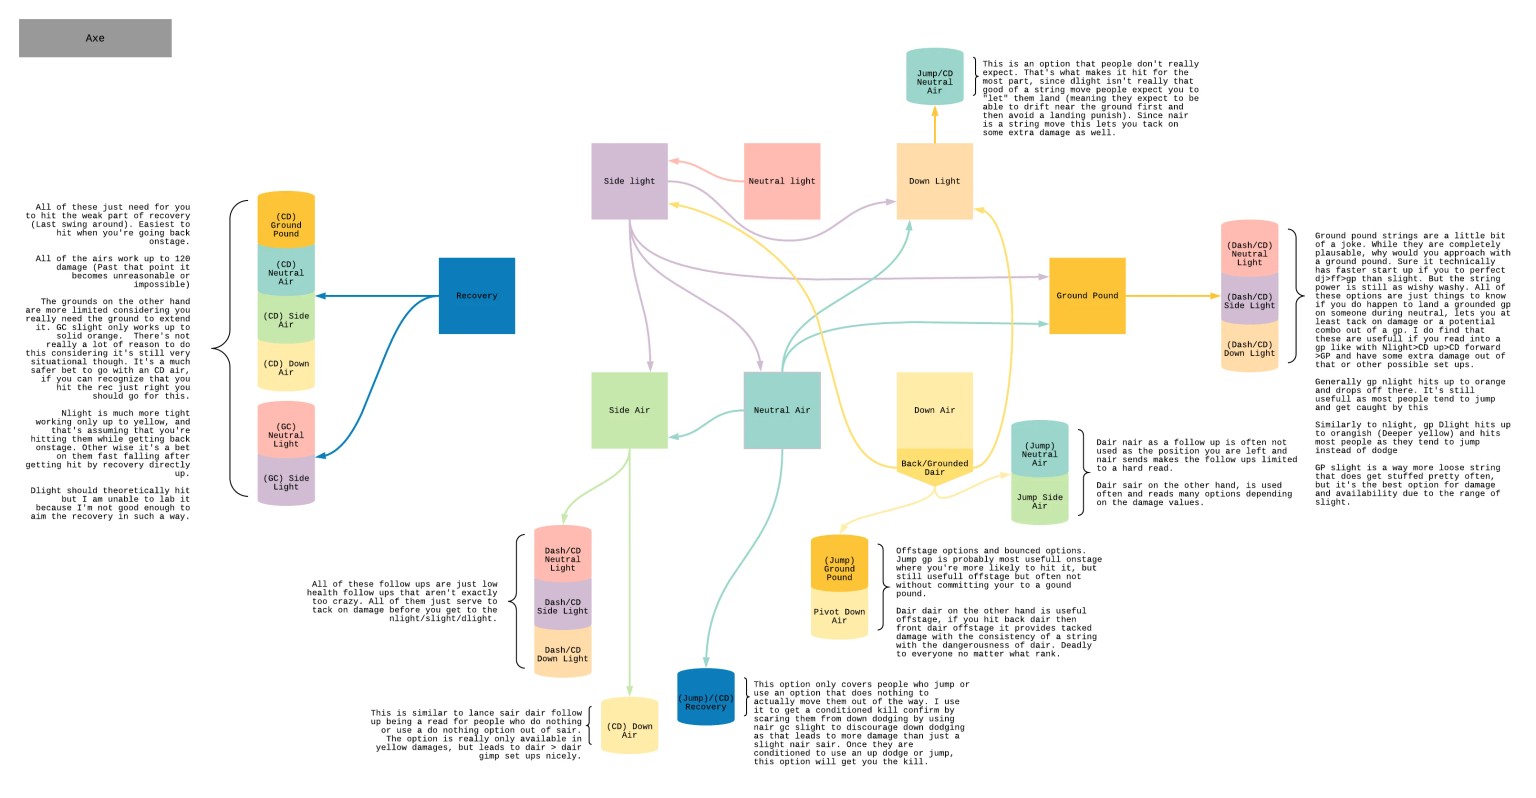
Separate each follow-up by target height, damage and whether you can return to stage.
Build an Axe map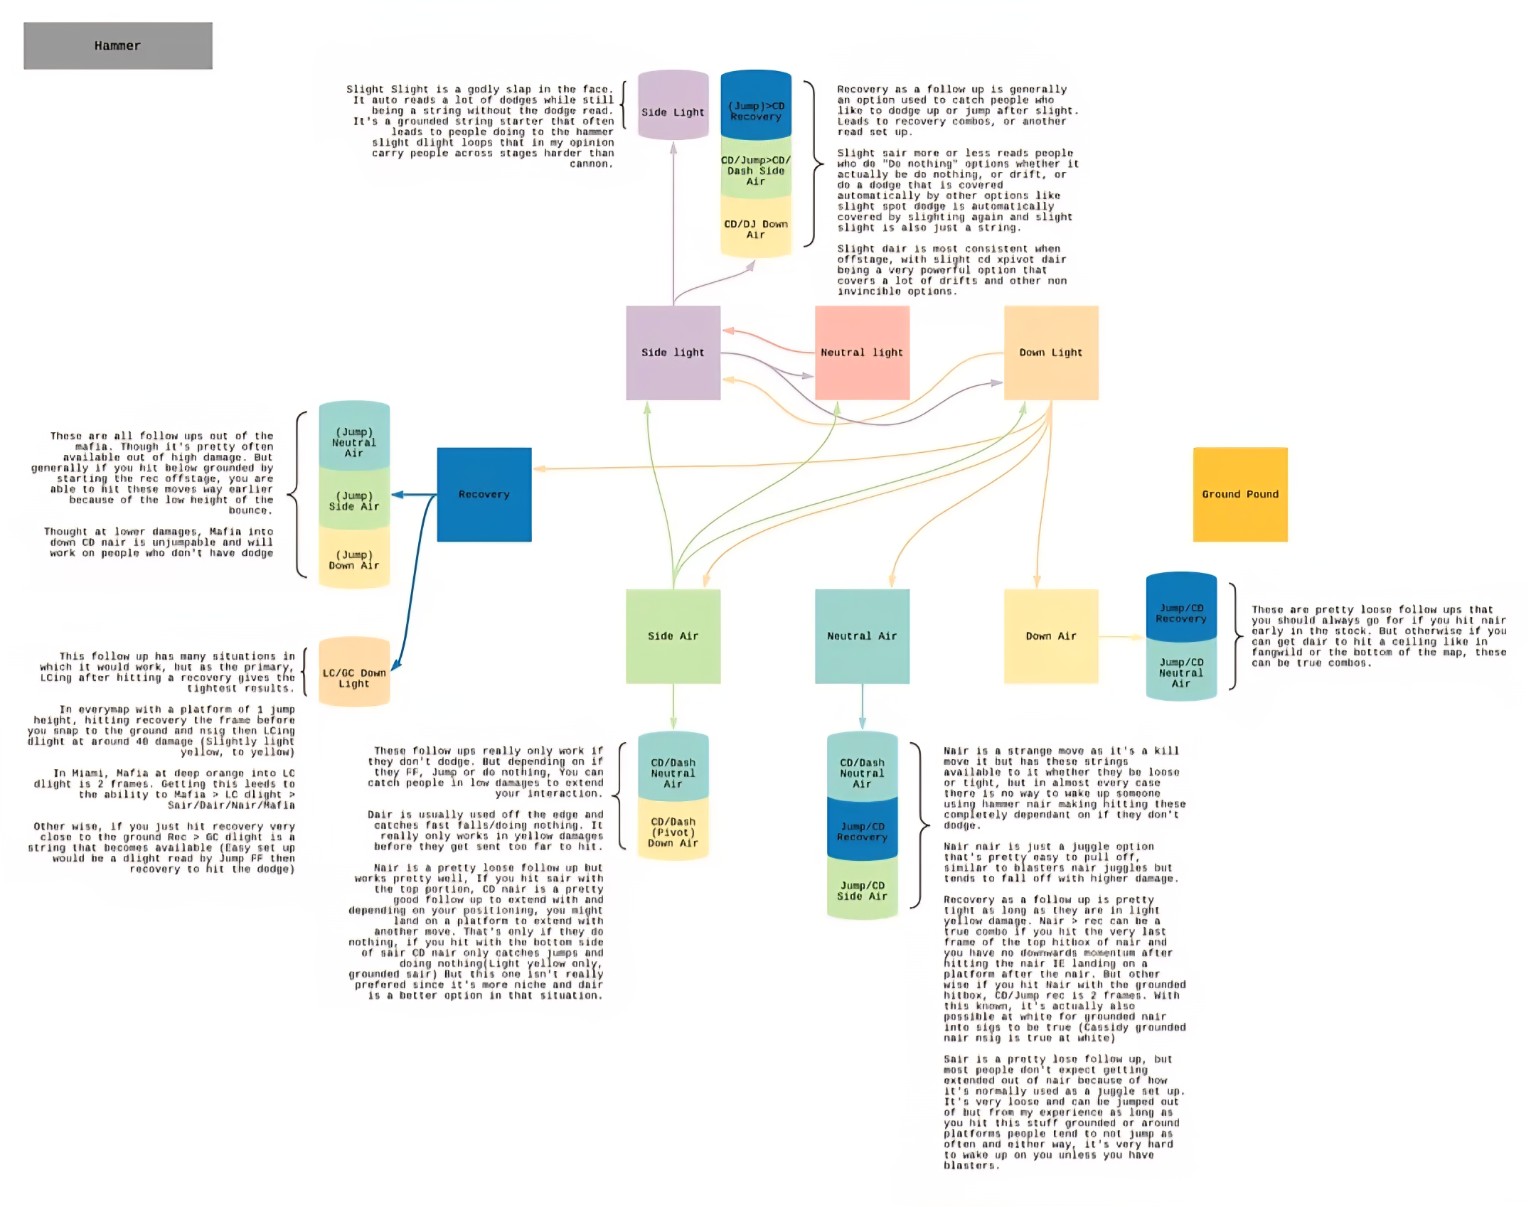
A grounded conversion trunk and situational aerial catches are different decisions.
Build a Hammer map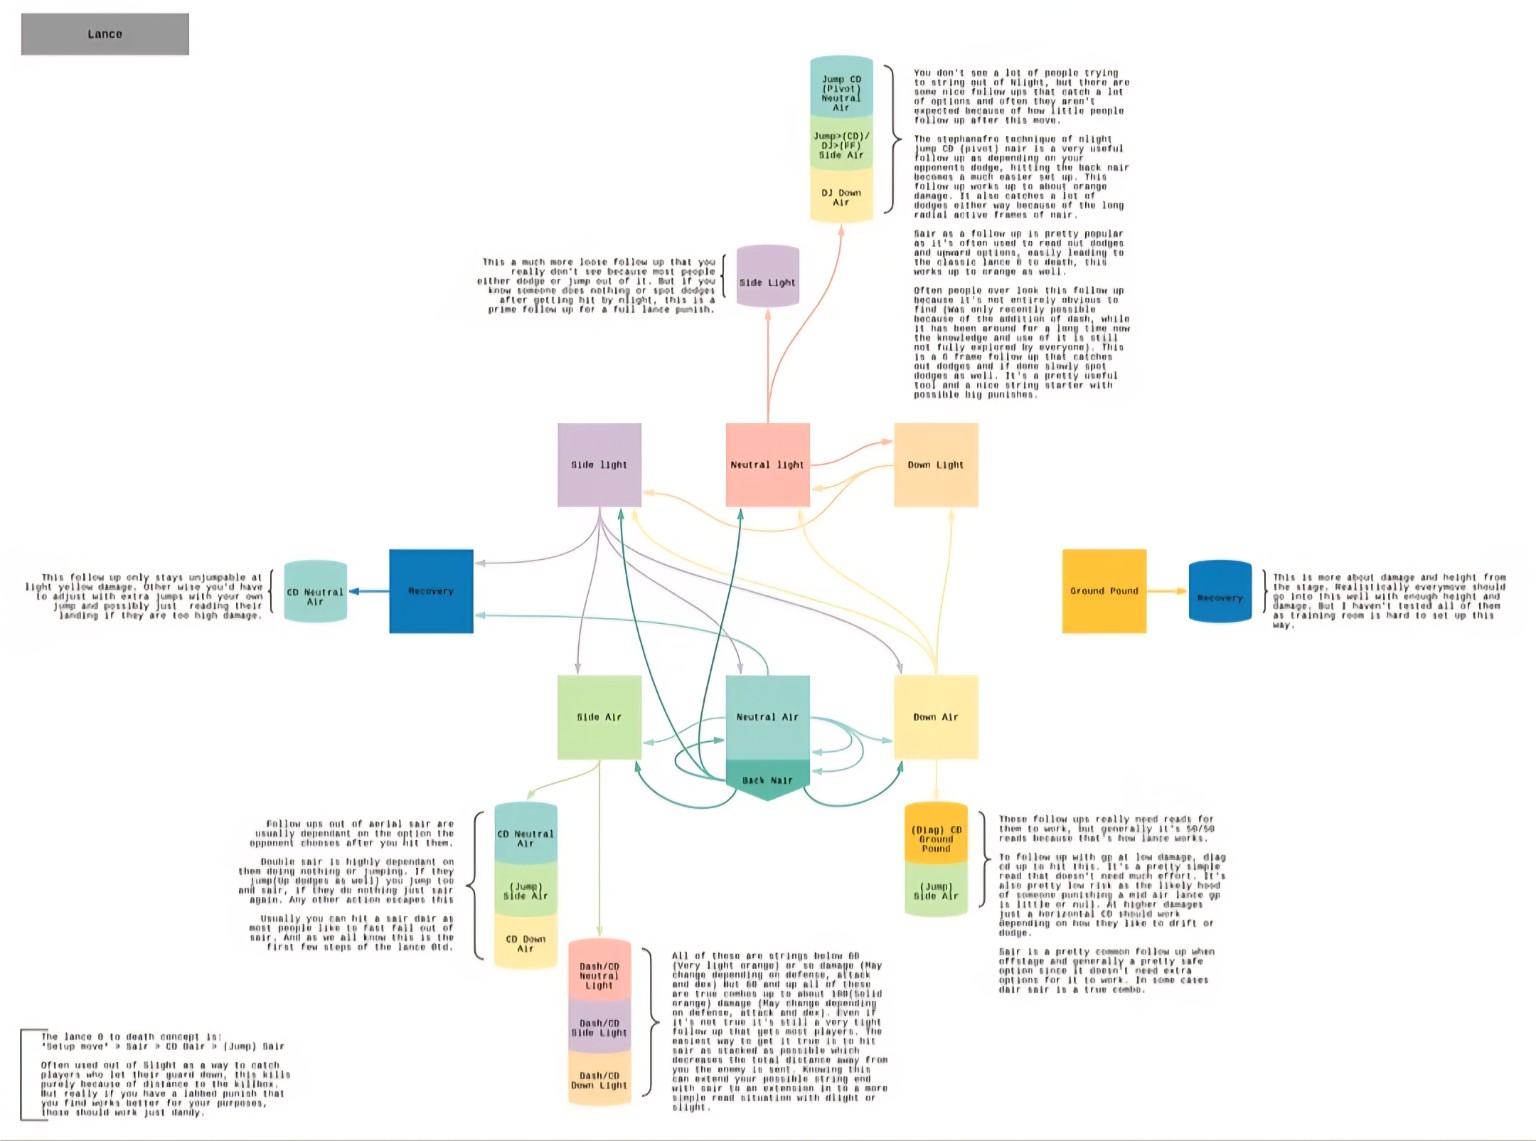
Movement, jump height and the last hitbox decide whether the next branch is available.
Build a Rocket Lance map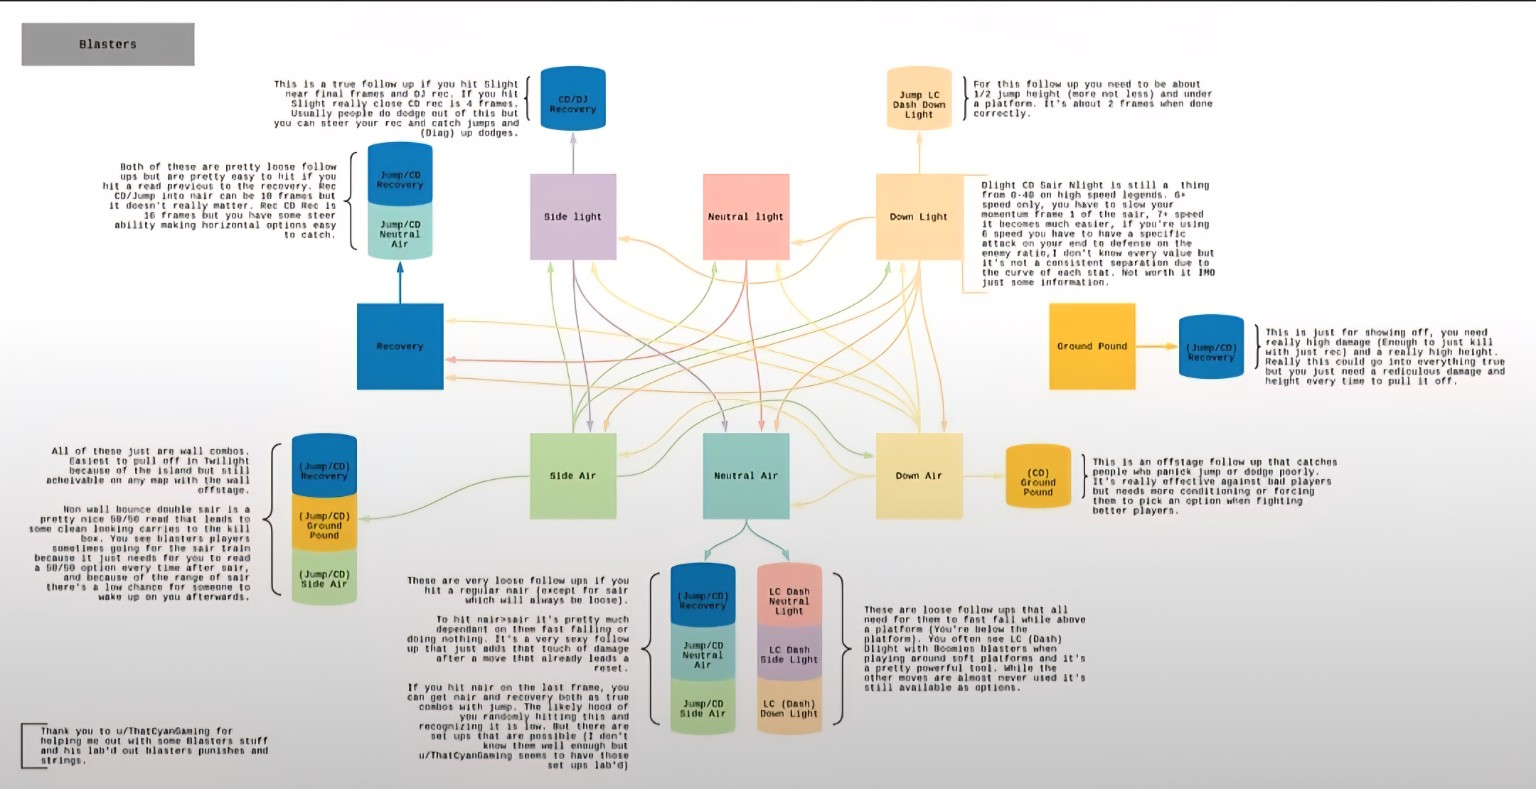
Put the jump-height and landing requirements beside the arrow, rather than hiding them in memory.
Build a Blasters map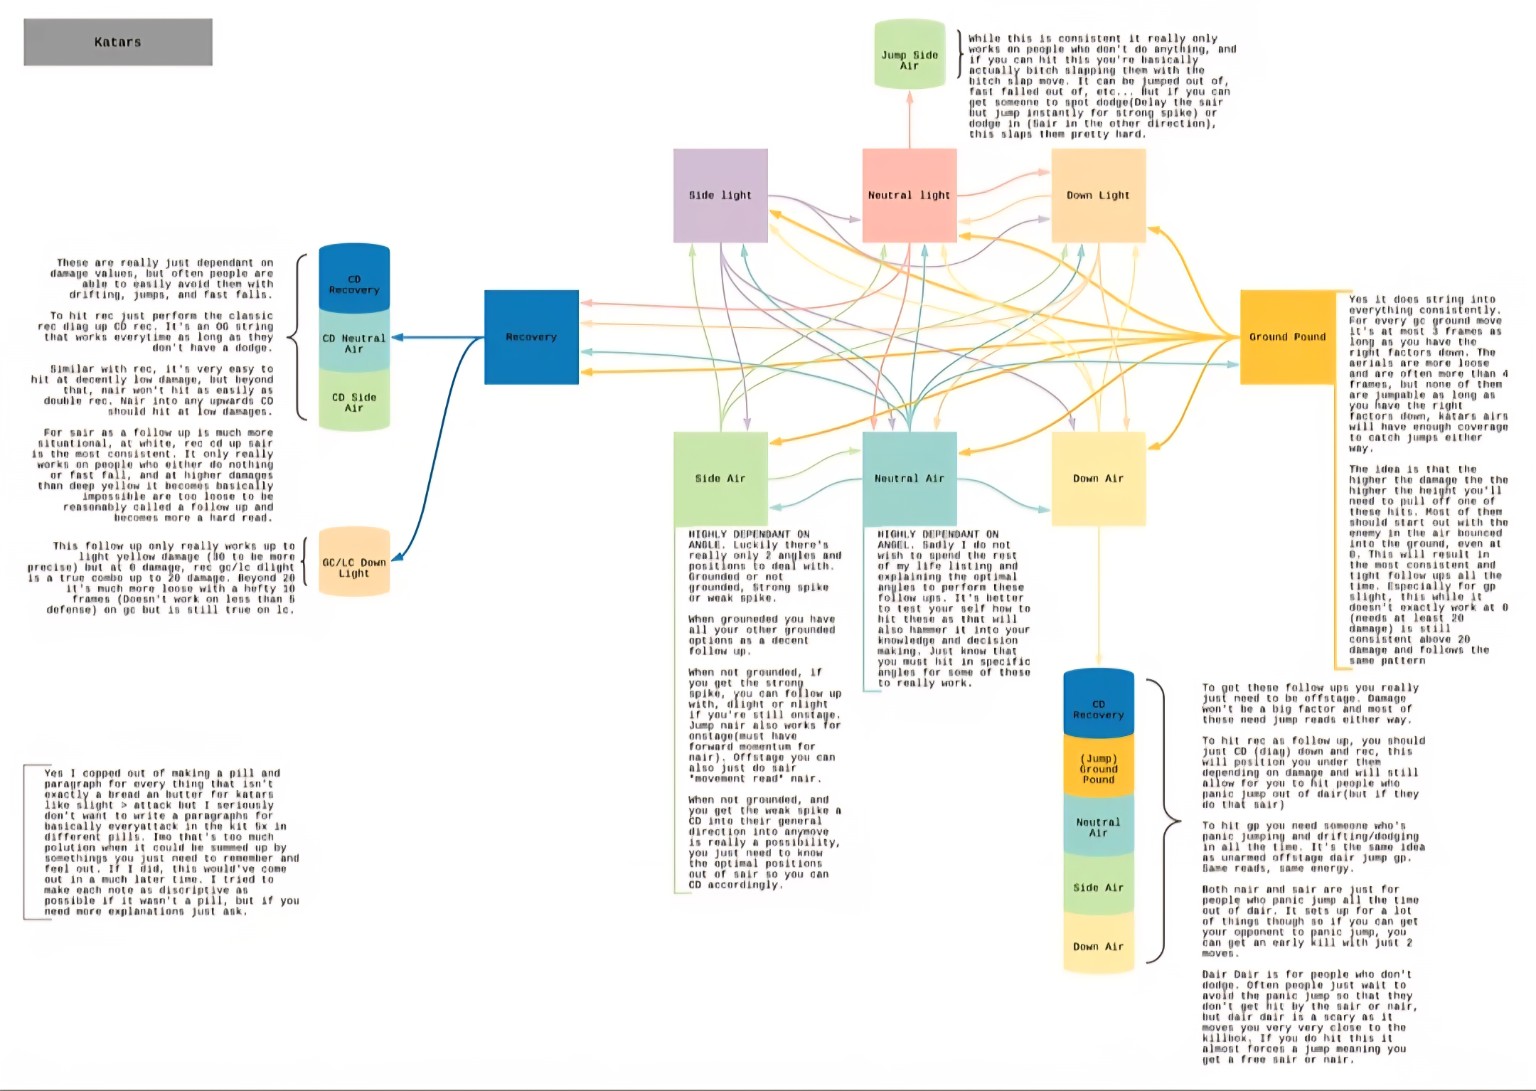
A loop needs an angle, a grounded state and a response check. The reset belongs on the map too.
Build a Katars map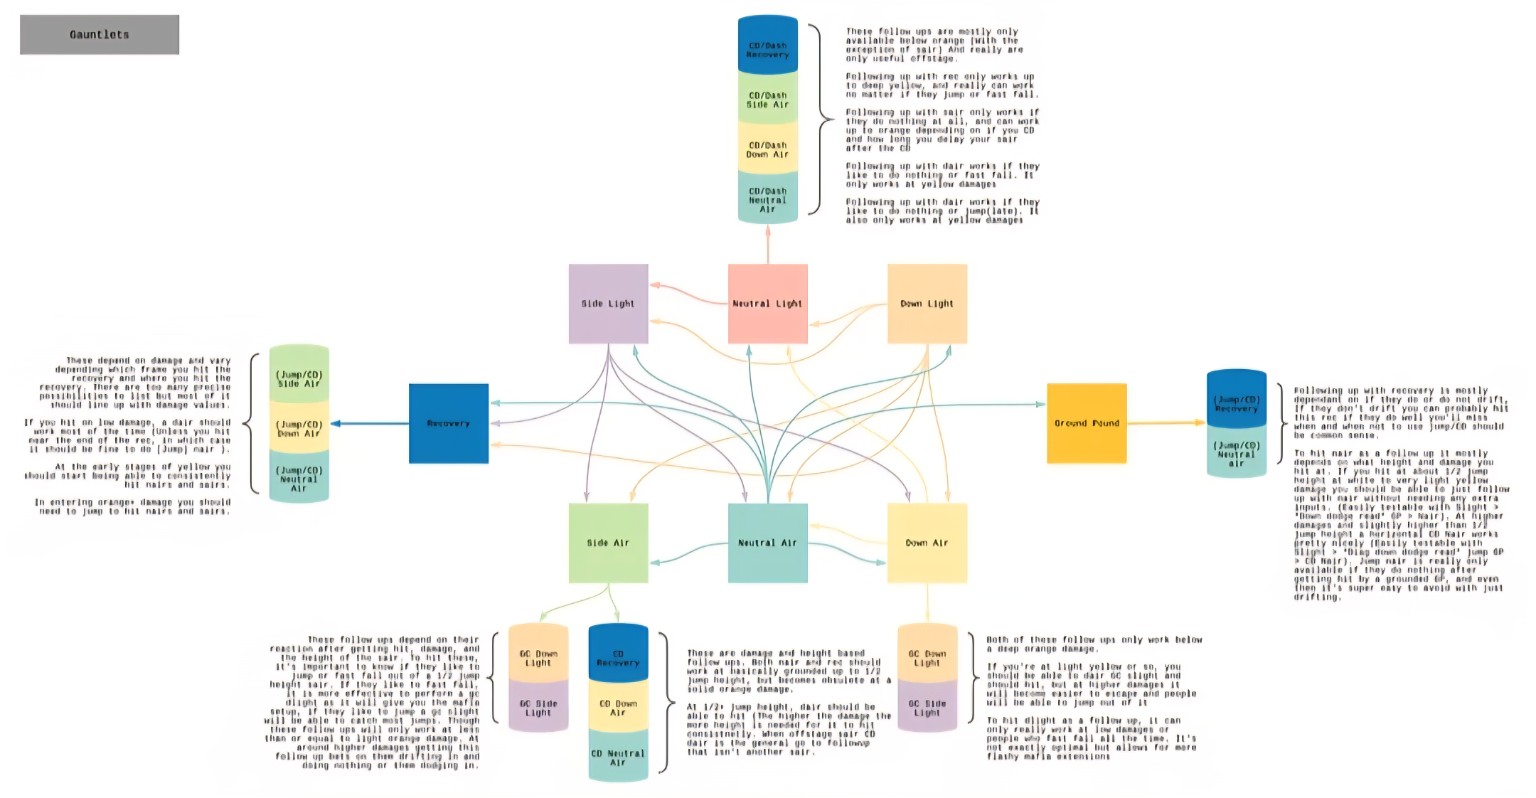
Split grounded follow-ups from aerial carries and show what ends the sequence.
Build a Gauntlets map